Episode 1-1: Introduction to DUST - the Mac tool for C64 development
Topics: Introduction into the DUST Command Line Utility for Mac OSX. Get a complete C64 cross development environment in three minutes with all the bells and whistles.
- Episode 1-1: Introduction to DUST - the Mac tool for C64 development
- Episode 1-2: working without DUST environment
The joy of cross-development
While coding the Commodore C64 is fun, coding ON the C64 is not so much by todays standards. You probably don't want to hack and comment code in a 40x25 screen, you also don't want to miss helpful tools and functions in todays editors, source code versioning, quick testing, etc. Of course please feel encouraged to use real hardware to see your work in a true retro environment - this is something cross development will never provide.
Since the times are no more when one put notes and register information on a piece of paper or draw sprites on quad-ruled paper first we should ask what development environment we want. . To have fun by todays coding standards I wanted the following covered on a Mac OSX system:
- efficient and fun workflow - develop, compile, crunch and run code triggered within the editor on a key press or from the command line
- IDE with 6502 and eventually BASIC syntax highlighting
- no Installation hell - ideally a package manager-like solution
So when I started to learn coding 6502 assembler last year I built my setup from scratch without real pointers what the right approach might be on a Mac. There are two to me known all-in-one editors for Windows, C64Studio and Relaunch64. The latter is also now available in a Beta-Version based on Java that somewhat works on a Mac but I rather wanted to use a rock-solid Mac-based IDE instead which is Sublime Text 2.
I wanted to write tutorials for beginners like me and provide the code in a easy to use way. nd for what it's worth - the whole setup on the Mac must be ready within minutes and all installed software should be upgradable without hassle with a one step command.
What needs to be set up by you:
- If your OSX Version is lower than 10.7.4 you need to Install Apples XCode. With OSX Versions 10.7.4 or higher you can just download the much smaller CLI Package also provided by Apple on their download page (one time registration required).
- Two small tools need to be installed, git and node.js - both are available as one click installers.
What DUST will set up for you:
- Of course the 'dust' command line suite
- ACME Cross Compiler (6502 compiler which compiles your source code to a executable .prg file
- exobasic (optimizer for Basic 2.0 and many of its extensions like Simons Basic).
- Sublime Text 2 plus a few extensions and scripts
- pucrunch (a cruncher which will pack the output file created by ACME)
- Vice64 (the C64 Emulator which runs your code)
- Sidreloc (helpful utility to relocate sid files in C64 memory)
Sublime will be configured to provide syntax highlighting for 6502 assembler and BASIC. Build Systems are setup so you can compile and run code with one short cut.
The feature history of DUST
DUST started out as a simple shell script I executed from an text editor to compile C64 Machine Language code to run it in VICE - rather than to do this in the shell each time I wanted to check something.
Over Time features were consecutively added:
- automatic installation process to install various tools for the command line and the OSX desktop including emulation of some popular Win32 tools
- Configuration of the tools like addition of Syntax Highlighting for Machine Language and BASIC code n Sublime Text 2.
- Commands to create a basic project layout for Machine Language and BASIC
- Download of code for tutorials published on dustlayer.com
- Support for automatic setup routines and configuration for additional systems is included but I have not added any other system in addition to the C64 yet.
Also the tool was moved from being a shell script to a node.js driven solution as it allowed for more flexibility and easy installation and distribution via NPM.
Let's start with the three steps of installation work!
1. Download and install XCode or the Command Line Tools
Command Line tools (OSX 10.7.3+)
If you don't have XCode installed in the past and your OSX Version is higher than 10.7.3, than you can just download the Command Line Tools by Apple which will install all the utilities needed to do day by day development . Download a version which matches your system at the Apple Developer Portal.
XCode (OSX >10.7.3 or for people who already have XCode installed)
If your OSX Version is below 10.7.3, just need to download XCode at the same place mentioned above. The difference is that XCode includes lots of things we will not need but makes the download much bigger plus there is an extra setup to enable the command line tools:
When XCode is installed you need to post-install the XCode Command Line Tools. The install button is well hidden in the XCode Preferences under the Downloads tab:
2. Install git and node.js
Bot Git and Node.JS are available as One-Click installers.
3. Install DUST
Installing DUST is very easy. Just go into your terminal and type the following command. There actually already was a project named 'dust' so I had to choose the name dustlayer for the package - well, first come first serve.
After a short while DUST is installed at your system. The installation output should look like this. After the installation, invoke the DUST command and check if it works.
4. Setup environment
Now it's a matter of setting up your environment using the DUST utility. Just type dust setup and everything will be installed and configured to get going. You typically want to use the 'Install all'-option unless you want to use an editor other than Sublime 2.
After Setup is completed, you should download a project with the command 'dust tutorials', e.g. for the Episode 2 tutorial to test your setup. You also need to select the build system in Sublime which must be done in the Tools/Build System menu only once.

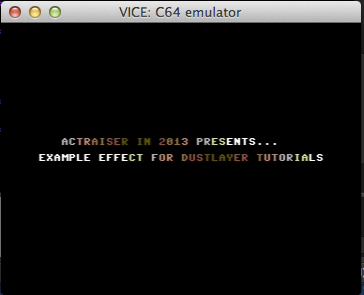
Select "c64" for assembling 6502 code. Make sure the file index.asm is still the focused file in the editor and then hit ⌘ + B to compile and execute. Vice will open and run the example.
By the way, if you do modifcations to the code, you can just hit ⌘ + B again without closing Vice before-hand. The assemble script will take care that eventual open Vice Sessions are closed. If you want to test the basic project you need to change the build system to 'c64 basic'. Dustlayer focuses on 6502 coding though but I wanted to include support for BASIC editing and executing nevertheless.
The setup will eventually improve over time, update individual components or add new features. Updating will be very simply using a single npm command. I hope this tool lifts a lot of work from anyone who want to kickstart on C64 development on Mac OSX.
-act